Container Upgrade - Experiences Updating Three Databases
- 10 minutes read - 1998 words*Updated Dec 16, 2021
I created a demo project a couple of years ago that included a lot of technical setup - containers, data import, queries, and such. I presented it for a conference or two, and while it was one of my favorite projects, it was a lot of preparation for the live demo.
I recently rediscovered the project, and submitted it to a couple of conferences. It got accepted, so I needed to upgrade the versions of all the software. With so much setup in the project, I thought it would certainly be a giant undertaking. However, I was pleasantly surprised on several things, even though a few things tripped me up. This blog post will document things I learned along the way, so that hopefully, you don’t run into the same road blocks I did…or at least, I might help you solve them faster. With that, let’s jump in!
Project background
First, a bit of background on what all is involved and what I was trying to accomplish with the project.
I wanted to showcase Spring Data and the many integrations it offers. I chose integrations with key players in their respective database spaces - MariaDB (relational, open source MySQL), MongoDB (document, NoSQL), and Neo4j (graph, NoSQL). I would later import data and create applications for this, but that is outside the scope of this post.
Of course, live coding is a really powerful way to demonstrate any technology, which meant I needed something manageable (i.e. similar and repeatable) to spin up each environment and data. For this, I chose Docker containers. Each of the databases in question provided a container image on Docker Hub that I could use.
Now to the technical details.
Upgrading the containers
One common change across all of my containers was that the syntax for defining an author in the Dockerfile had changed from a MAINTAINER wording to a LABEL term. You can see this in my commit from the docker-maria Github repository, and in similar commits for the docker-mongo and docker-neo4j repositories. While I don’t think this syntax feels as logical and clear to me, the old maintainer syntax is no longer supported by Docker, so this change was required.
Another difference to note is that my previous versions of these containers operated on the x86-64 architecture (my MacOS laptop, Intel chip); however, that laptop recently was replaced with one that has arm64 architecture (MacOS laptop, Apple silicon chip). Some containers support both architectures in the same image, but others do not - I’m looking at you, Neo4j. 😅 I’ll talk more about this with each image.
*Note(2021-12-16):* As of Neo4j version 4.4+, the Neo4j official DockerHub image supports both amd64 (Intel chip) and arm64 (Apple silicon chip) architectures (see OS/ARCH for each tag). If you are using Neo4j prior to v4.4, then you will need to use the neo4j/neo4j-arm64-experimental DockerHub repository.
MariaDB
Outside of that change (plus adding a README to the repository), I needed to rebuild the container locally, which pulled the latest version of the MariaDB base image. I didn’t need to do anything different for my Apple silicon chip, as the same base image supports both architectures. We can see this in the mariadb image tags, as shown below. Both x86-64 and ARM 64 are there.

Once I pulled the latest version of the container and tested it, I pushed the updated image to my personal Docker Hub repositories. The commands used to do all of these steps are listed below.
docker build . -t jmreif/mariadb

docker run --name mymaria -p3306:3306 \
    -d -v $HOME/Projects/docker/data/maria:/var/lib/mysql \
    -v $HOME/Projects/docker/logs/maria:/var/log/mysql \
    -e MYSQL_ROOT_PASSWORD=Testing123 \
    jmreif/mariadb

docker push jmreif/mariadb
The second command in the code block above is a bit long due to all of the options. I also included the same command in the run script from the Github repository, so if you clone the whole repository, you can run the script in place of the docker run command above.
First, I use the --name option to give my container instance a name. This allows me to reference the container by name in commands, instead of using the container id (complicated alphanumeric value). I then bind the container port to a host port using -p (syntax is hostPort:containerPort). Since MariaDB’s default port is 3306, I stick with that, so we bind my machine’s 3306 port to the container’s 3306 port.
The -d option that follows is to run the container in detach mode. This means it runs in the background, making it easier to see the container and gain access to it. The next two options use the -v flag, which mounts folders from the host device into the container. This means that if I have files or scripts I need to access inside the container, the container can see these through a mounted volume. In our case, we have mapped a local data folder to the /var/lib/mysql folder in the container (for data load), and we have mapped a local log folder to the /var/log/mysql folder in the container (for viewing log files).
Next, our -e option is setting environment variables to pass into the container. For us, this means a password for the database. The last bit of text in the command is specifying the image to use for building the container (jmreif/mariadb).
With that knowledge, we can take a look at the MongoDB container changes.
MongoDB
Moving now to the docker-mongo repository, we don’t see too many changes here either. The change for the author syntax on the Dockerfile was mentioned earlier, and I added a README for details. Otherwise, I did the same as with the MariaDB container - rebuilt the image so it pulled an updated mongo base image, then tested the container, then pushed the updated version.
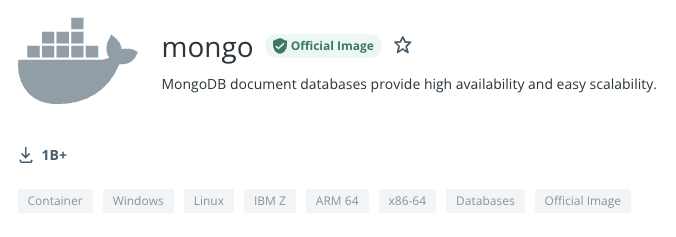
The MongoDB base image also supports multiple architectures (including x86-64 and arm64), so I didn’t need to do anything different. We can confirm this with the Docker Hub image screenshot below. The x86-64 and ARM 64 tags are both there.

The commands for all these steps are very similar to the MariaDB ones shown earlier, but we will note the differences below.
docker build . -t jmreif/mongodb

docker run --name mymongo -p27017:27017 \
    -e MONGO_INITDB_ROOT_USERNAME=mongoadmin \
    -e MONGO_INITDB_ROOT_PASSWORD=Testing123 \
    -d -v $HOME/Projects/docker/data/mongo:/data/db \
    -v $HOME/Projects/docker/logs/mongo:/logs \
    -v $HOME/Projects/docker/tmp/mongo:/tmp \
    jmreif/mongodb

docker push jmreif/mongodb
We will focus on the second command. The syntax is similar, using the --name option to specify a name for our container and then using the -p option to bind a container port to a host port, with 27017 being MongoDB’s default port. Next, we specify our environment variables for the database username and password with -e. If you remember, we specified these options last in our mariadb container, but ordering doesn’t really matter here. After our password, we use the -d option to run the container in the background and have three -v options for mounting data, logs, and temporary folders to the container. Lastly, we have the image name used for creating the container.
This completes our update for the MongoDB container. Now we can continue on to Neo4j.
Neo4j
With Neo4j’s latest update to version 4.4, the changes align very closely with those we saw for MariaDB and MongoDB. As you might have guessed, we changed the author syntax in the Dockerfile for Neo4j, just as we did with MariaDB and MongoDB. I also added a README file in this repository to match the others. Looking at the commit, though, there are a couple other changes, so let’s walk through those.
*Note(2021-12-16):* Neo4j supports multi-arch as of version 4.4+! For Neo4j 4.3 and older, the Neo4j arm64 image supports arm64. You will need to pull a different base image by modifying the base image line to use the neo4j-arm64-experimental image.
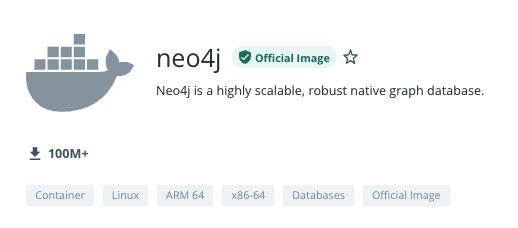
We can see both the specified architectures on the official Neo4j repository in the screenshot below.

Neo4j also requires you to specify a version tag for the image (actually a Docker best practice), so I used the 4.4.1 version. However, feel free to use one to fit your needs. The current (as of writing this) release version is 4.4, so picking any minor versions of that ensures you have the latest features.
Next, I exposed an extra port for the default Neo4j HTTPS port (7473). The other two ports in the Dockerfile are for Neo4j’s default HTTP and BOLT ports, respectively. Though it is not required to have them all, I have all connection types covered.
With those changes in place, we can build, test, and push the new container. As before, I’ll show the commands used for all of these steps below.
docker build . -t jmreif/neo4j

docker run \
    --name myneo4j -p7474:7474 -p7687:7687 \
    -e NEO4J_AUTH=neo4j/Testing123 \
    -d -v $HOME/Projects/docker/data/neo4j:/data \
    -v $HOME/Projects/docker/logs/neo4j:/logs \
    -v $HOME/Projects/docker/data/neo4j/import:/import \
    -v $HOME/Projects/docker/data/neo4j/plugins:/plugins \
    jmreif/neo4j

docker push jmreif/neo4j
The only change for the build and push commands is the image name, so we will skip to the run command differences. All of the options should look familiar, since we don’t have anything new compared to the MariaDB and MongoDB versions. The --name option lets me set a container name for referencing, and the -p lets me map host to container ports. In this case, I’ve bound both 7474 and 7687, which are the HTTP and BOLT ports for Neo4j. This means I can access Neo4j Browser using port 7474, and I can connect via applications through 7687 with the bolt protocol.
On the next line, the -e option is used to set an environment variable for the username and password (both are set with a single variable, using a / to separate the two values). A -d option follows that to run the container in the background, and then all of our -v options mount folders for data and logs, as well as two Neo4j-specific ones for import files (/import) and plugins (for adding extensions like APOC). The final bit of text specifies the image to use for building the container - jmreif/neo4j.
Doing things with the container
There are a variety of commands you can use to access and interact with the containers we just upgraded. Probably some of the most common are listed below.
docker start <containerName>: starts a stopped, existing containerdocker stop <containerName>: stops a running containerdocker rm <containerName>: delete a container. You will need to do adocker runcommand again to create a fresh container. Use when you need to change options in the run command or make adjustments to the Dockerfile. Note: if you make adjustments to the Dockerfile, that you will also need to rebuild the image.docker exec -it <containerName> <type>: allows you to ssh into the container. Helpful for running scripts, loading data, and making other changes inside the container itself.
I hope to cover more about these pertaining to this project in later posts, but there is plenty of general documentation for these commands, as well.
Wrapping up!
In this post, we walked through my experience of upgrading Docker containers for three major databases - MariaDB, MongoDB, and Neo4j. All of our database images support multiple architectures, simplifying our process and future updates. I honestly expected more hassle across the board with Docker and the recent Apple silicon chip. The transition wasn’t too big of a hurdle.
We also looked at the commands for how to rebuild images so that they pull latest versions, whether through a default (not specifying a tag for the base image in the Dockerfile) or through defining a base image tag. Lastly, we reviewed the commands for rebuilding images and pushing them to a repository on DockerHub so that we can share them.
As a final note, if you have any questions or want to provide feedback on Neo4j’s Docker container, please do raise Github issues or ask questions!
Happy coding!
Resources
Documentation: Docker run command
Documentation: Docker command list
Developer guide: Docker and Neo4j